


Crafting large-sized handcraft plastic molds is a specialized process that requires a combination of skill, knowledge, and the right tools. As a seasoned Handcraft Plastic Molds supplier, I've had the privilege of guiding numerous clients through this intricate journey. In this blog post, I'll share the step-by-step process of making large-sized handcraft plastic molds, offering insights and tips that I've gathered over the years.
Understanding the Basics
Before delving into the actual process, it's crucial to understand the fundamental concepts behind handcraft plastic molds. Plastic molds are used to create a wide range of products, from small trinkets to large industrial components. The process involves pouring liquid plastic into a mold cavity, allowing it to cool and solidify, and then removing the finished product from the mold.
Large-sized handcraft plastic molds present unique challenges due to their size and complexity. They require careful planning, precise measurements, and a thorough understanding of the materials and techniques involved. Additionally, large molds often need to be designed to withstand the pressure and stress of the plastic injection process.
Step 1: Designing the Mold
The first step in making a large-sized handcraft plastic mold is designing it. This involves creating a detailed blueprint of the mold, including the shape, size, and features of the finished product. The design should also take into account the type of plastic that will be used, as different plastics have different properties and require different mold designs.
When designing a large mold, it's important to consider the following factors:
- Ease of removal: The mold should be designed in such a way that the finished product can be easily removed without damaging the mold or the product.
- Ventilation: Proper ventilation is essential to prevent air bubbles from forming in the plastic during the injection process.
- Cooling channels: Large molds often require cooling channels to ensure that the plastic cools evenly and quickly, reducing the risk of warping or cracking.
- Reinforcement: To withstand the pressure and stress of the plastic injection process, large molds may need to be reinforced with additional materials, such as steel or aluminum.
Step 2: Selecting the Right Materials
Once the mold design is complete, the next step is selecting the right materials. The choice of materials will depend on several factors, including the type of plastic that will be used, the size and complexity of the mold, and the intended use of the finished product.
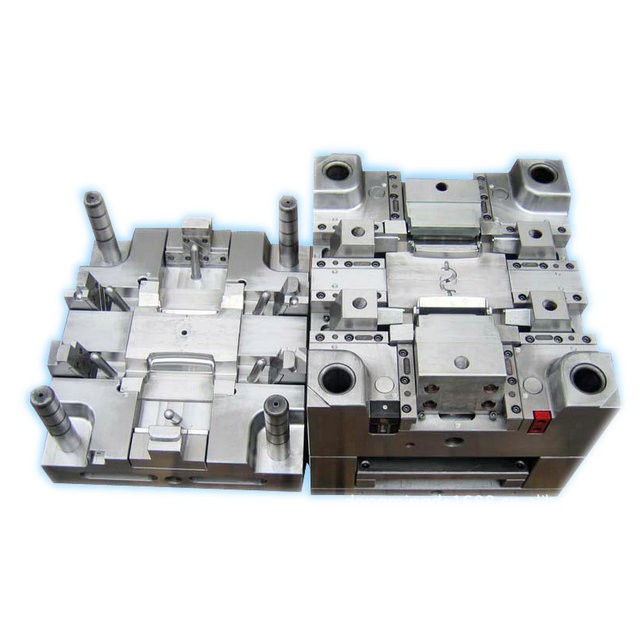

Some of the most common materials used for handcraft plastic molds include:
- Silicone: Silicone is a popular choice for handcraft plastic molds due to its flexibility, durability, and resistance to heat and chemicals. It's also relatively easy to work with and can be used to create molds of various shapes and sizes.
- Epoxy resin: Epoxy resin is another commonly used material for handcraft plastic molds. It's strong, rigid, and resistant to wear and tear, making it ideal for creating molds that will be used repeatedly.
- Polyurethane: Polyurethane is a versatile material that can be used to create both flexible and rigid molds. It's also resistant to impact, abrasion, and chemicals, making it suitable for a wide range of applications.
Step 3: Preparing the Mold Surface
Before pouring the mold material, it's important to prepare the mold surface to ensure a smooth and even finish. This involves cleaning the surface of the mold and applying a release agent to prevent the mold material from sticking to the surface.
The release agent can be a commercial product or a homemade solution, such as a mixture of wax and oil. It's important to apply the release agent evenly and allow it to dry completely before pouring the mold material.
Step 4: Pouring the Mold Material
Once the mold surface is prepared, the next step is pouring the mold material. This should be done carefully and slowly to avoid introducing air bubbles into the mold. It's also important to pour the material in layers, allowing each layer to dry before adding the next one.
When pouring a large mold, it may be necessary to use a pouring box or a mold frame to contain the mold material and prevent it from spilling. It's also a good idea to use a vacuum chamber to remove any air bubbles from the mold material before pouring it into the mold.
Step 5: Curing the Mold
After pouring the mold material, the next step is curing it. This involves allowing the mold material to dry and harden completely. The curing time will depend on the type of mold material used and the size and complexity of the mold.
During the curing process, it's important to keep the mold in a warm, dry place and avoid disturbing it. It's also a good idea to cover the mold with a plastic sheet or a cloth to prevent dust and debris from settling on the surface.
Step 6: Removing the Mold
Once the mold is fully cured, the next step is removing it from the mold surface. This should be done carefully to avoid damaging the mold or the finished product. It's also important to use a sharp tool, such as a knife or a scalpel, to cut the mold away from the surface.
After removing the mold, it's a good idea to clean it thoroughly and inspect it for any defects or damage. If any defects are found, they should be repaired before using the mold.
Step 7: Finishing the Mold
The final step in making a large-sized handcraft plastic mold is finishing it. This involves sanding the surface of the mold to remove any rough edges or imperfections and applying a final coat of release agent to make it easier to remove the finished product from the mold.
It's also a good idea to test the mold by pouring a small amount of plastic into it and allowing it to cool and solidify. This will help to ensure that the mold is working properly and that the finished product is of high quality.
Mold Maintenance and Usage Considerations
Proper maintenance and usage of handcraft plastic molds are essential to ensure their longevity and performance. To learn more about Mold Maintenance and Usage Considerations, I recommend visiting our website.
Liquid Silicone Injection Mold
If you're interested in using liquid silicone for your handcraft plastic molds, you may want to explore our Liquid Silicone Injection Mold. This type of mold offers several advantages, including high precision, excellent surface finish, and the ability to create complex shapes.
Handcraft Plastic Molds
As a Handcraft Plastic Molds supplier, we offer a wide range of molds to meet the needs of our clients. Whether you're looking for a simple mold for a small project or a complex mold for a large-scale production, we can help. To learn more about our Handcraft Plastic Molds, please visit our website.
Conclusion
Making large-sized handcraft plastic molds is a challenging but rewarding process. By following the steps outlined in this blog post and using the right materials and techniques, you can create high-quality molds that will produce excellent results.
If you're interested in purchasing handcraft plastic molds or have any questions about the process, please don't hesitate to contact us. We're here to help you every step of the way.
References
- "Plastic Injection Molding Handbook" by Rosato, Rosato, and Schott
- "Mold Making: Casting and Fabrication" by Jim Pokorny
- "Silicone Rubber Molds: A Complete Guide" by Sherry Serafini


