


Hey there! As an injection mold supplier, I've been through the ins and outs of the mold commissioning process countless times. Today, I'm gonna walk you through the steps involved in commissioning an injection mold, sharing some tips and insights along the way.
Step 1: Design and Planning
Before we even start building the mold, there's a whole lot of design and planning that needs to happen. This is where we work closely with our clients to understand their requirements, such as the shape, size, and material of the part they want to produce. We use advanced CAD (Computer-Aided Design) software to create a detailed 3D model of the mold, which allows us to visualize the design and make any necessary adjustments before manufacturing begins.
During this phase, we also consider factors like the number of cavities (the number of parts the mold can produce in one cycle), the gating system (how the molten plastic will flow into the mold), and the ejection mechanism (how the finished parts will be removed from the mold). These decisions can have a big impact on the efficiency and quality of the molding process, so it's important to get them right from the start.
Step 2: Mold Manufacturing
Once the design is finalized, it's time to start manufacturing the mold. This involves a combination of machining processes, such as milling, turning, and electrical discharge machining (EDM), to shape the mold components from high-quality steel or other materials. The manufacturing process is highly precise, with tight tolerances to ensure that the mold meets the exact specifications of the design.
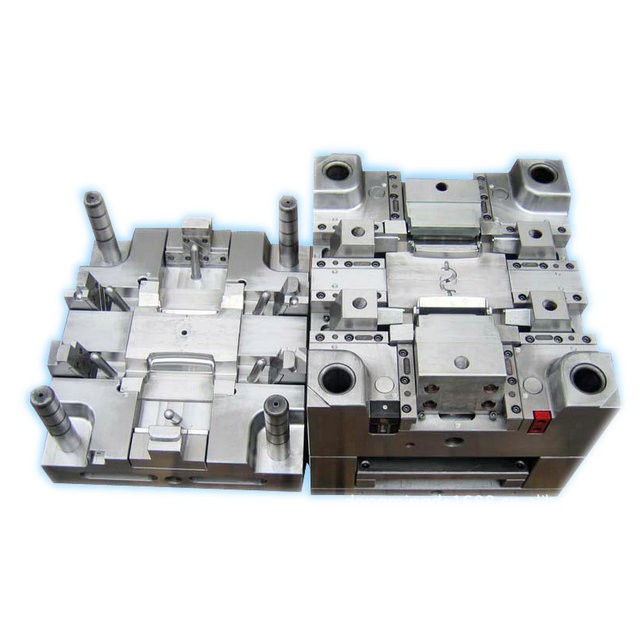

After the individual components are machined, they are carefully assembled and tested to make sure everything fits together correctly. Any issues or defects are addressed at this stage to prevent problems during the commissioning process. This is also a good time to add any surface treatments or coatings to the mold to improve its durability and performance.
Step 3: Pre-Commissioning Checks
Before we can start running the mold on the injection molding machine, there are a few pre-commissioning checks that need to be done. First, we inspect the mold for any signs of damage or wear that may have occurred during transportation or storage. We also check the dimensions and alignment of the mold components to make sure they are within the specified tolerances.
Next, we clean the mold thoroughly to remove any debris or contaminants that could affect the quality of the molded parts. This is typically done using a combination of solvents and ultrasonic cleaning equipment. We also lubricate the moving parts of the mold to ensure smooth operation.
Finally, we perform a dry run of the mold on the injection molding machine without any plastic material. This allows us to check the operation of the mold's ejection mechanism, the movement of the slides and cores, and the overall functionality of the mold. Any issues or adjustments that need to be made are noted and addressed before proceeding with the actual molding process.
Step 4: Molding Trials
Once the pre-commissioning checks are complete, it's time to start the molding trials. This involves running a series of test shots on the injection molding machine using the actual plastic material that will be used in production. The goal of the molding trials is to optimize the process parameters, such as the injection pressure, temperature, and cycle time, to produce high-quality parts that meet the client's specifications.
During the molding trials, we closely monitor the quality of the molded parts, checking for any defects such as flash (excess plastic), warping, or sink marks. We also measure the dimensions of the parts to make sure they are within the specified tolerances. Based on the results of the molding trials, we make adjustments to the process parameters as needed to improve the quality and consistency of the parts.
Step 5: Process Optimization
After the initial molding trials, we continue to optimize the molding process to achieve the best possible results. This may involve further adjustments to the process parameters, as well as changes to the mold design or the plastic material. We use a variety of tools and techniques, such as statistical process control (SPC) and mold flow analysis, to monitor and improve the process.
One important aspect of process optimization is reducing the cycle time of the molding process. This can significantly increase the productivity of the mold and reduce the cost per part. We do this by optimizing the cooling system of the mold, reducing the injection time, and improving the efficiency of the ejection mechanism.
Step 6: Quality Assurance
Throughout the commissioning process, quality assurance is a top priority. We have a rigorous quality control system in place to ensure that the mold and the molded parts meet the highest standards of quality. This includes regular inspections and testing of the mold components, as well as the finished parts.
We use a variety of inspection tools and techniques, such as coordinate measuring machines (CMMs), optical inspection systems, and hardness testing equipment, to verify the dimensions, surface finish, and mechanical properties of the mold and the parts. Any non-conforming parts are identified and rejected, and the root cause of the problem is investigated and addressed to prevent it from happening again.
Step 7: Final Acceptance
Once the molding process has been optimized and the parts have passed all the quality control tests, it's time for the final acceptance of the mold. This involves a final inspection of the mold and the parts by the client or their representative. If everything meets their requirements, the mold is officially accepted, and we can start the production process.
Before the mold is shipped to the client's facility, we provide them with a detailed documentation package that includes the mold design, the process parameters, the quality control records, and any other relevant information. We also offer training and support to help the client get up and running with the mold as quickly and smoothly as possible.
Conclusion
Commissioning an injection mold is a complex and multi-step process that requires careful planning, precise manufacturing, and thorough testing. By following these steps and paying attention to the details, we can ensure that the mold produces high-quality parts efficiently and reliably.
If you're in the market for an injection mold, we'd love to hear from you. We have a team of experienced engineers and technicians who can work with you to design and manufacture a custom mold that meets your specific requirements. Whether you need a Handcraft Plastic Molds or a Liquid Silicone Injection Mold, we have the expertise and the resources to get the job done right.
And don't forget to check out our Mold Maintenance and Usage Considerations page for some useful tips on how to keep your mold in top condition. Contact us today to discuss your project and get a free quote.
References
- "Injection Molding Handbook" by O. Olafsson
- "Mold Design for Injection Molding" by R. A. Malloy
- "Plastics Processing: Modeling and Simulation" by M. F. Doi


